Badge Owners have the authorization to add Badge Users. CI Solutions do not have the authority to add Badge Users to the account.

Owners can either individually add Users or upload a CSV file to import a collection of Users to Badge.- If you are unsure who are the Badge Owners, contact us or your team members for account information.
- Ensure you have the correct available seats before adding Badge Users.
Guide
Add a Badge User
1. Click Access in the top navigation bar

2. Click Users on the side
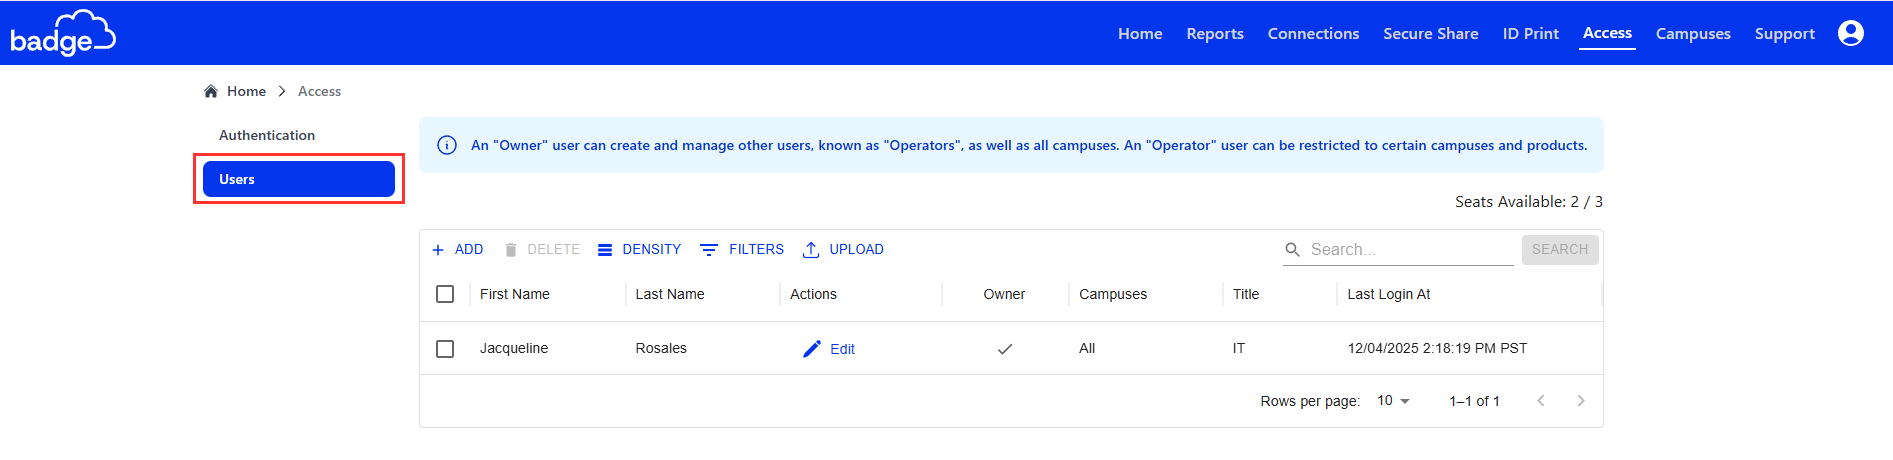
3. Click + ADD
- If seats are not available, click here create a ticket to add more seats.

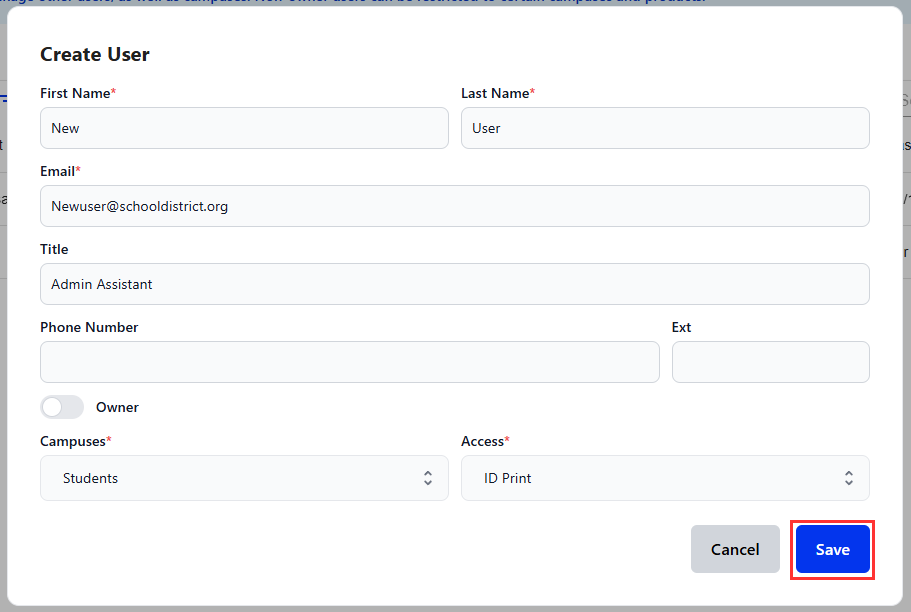
4. Enter the User's information
5. Select the User's campus access
- Campus selection indicates the User's access to student and staff information for each campus.
6. Select the User's access level
- All: Access to Secure Share and ID Print for selected campuses
- Secure Share: Only Access to Secure Share module for selected campuses
- ID Print: Only Access to ID Print module for selected campuses
7. Click Save
Upload to create Badge Users
Before importing, ensure your CSV UTF-8 file is properly formatted with the required headers/columns.

First Name | Last Name | Email Address
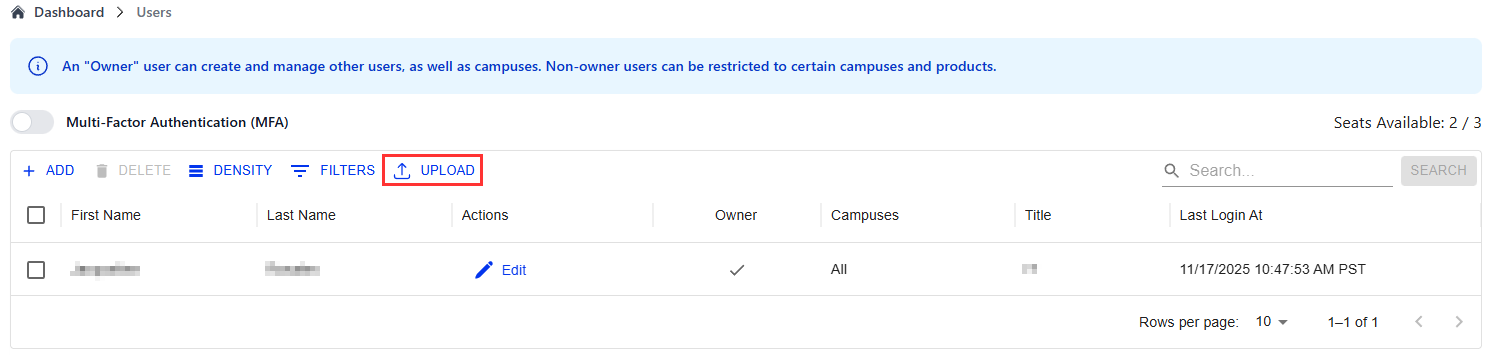
1. Click Access on the left side navigation bar

2. Click Users on the side

3. On the right-hand side, Click UPLOAD
4. Select Choose File
- A File Explorer window will open.
5. Find the CSV UTF-8 file you want to import > Double Click OR Select file and Click OPEN
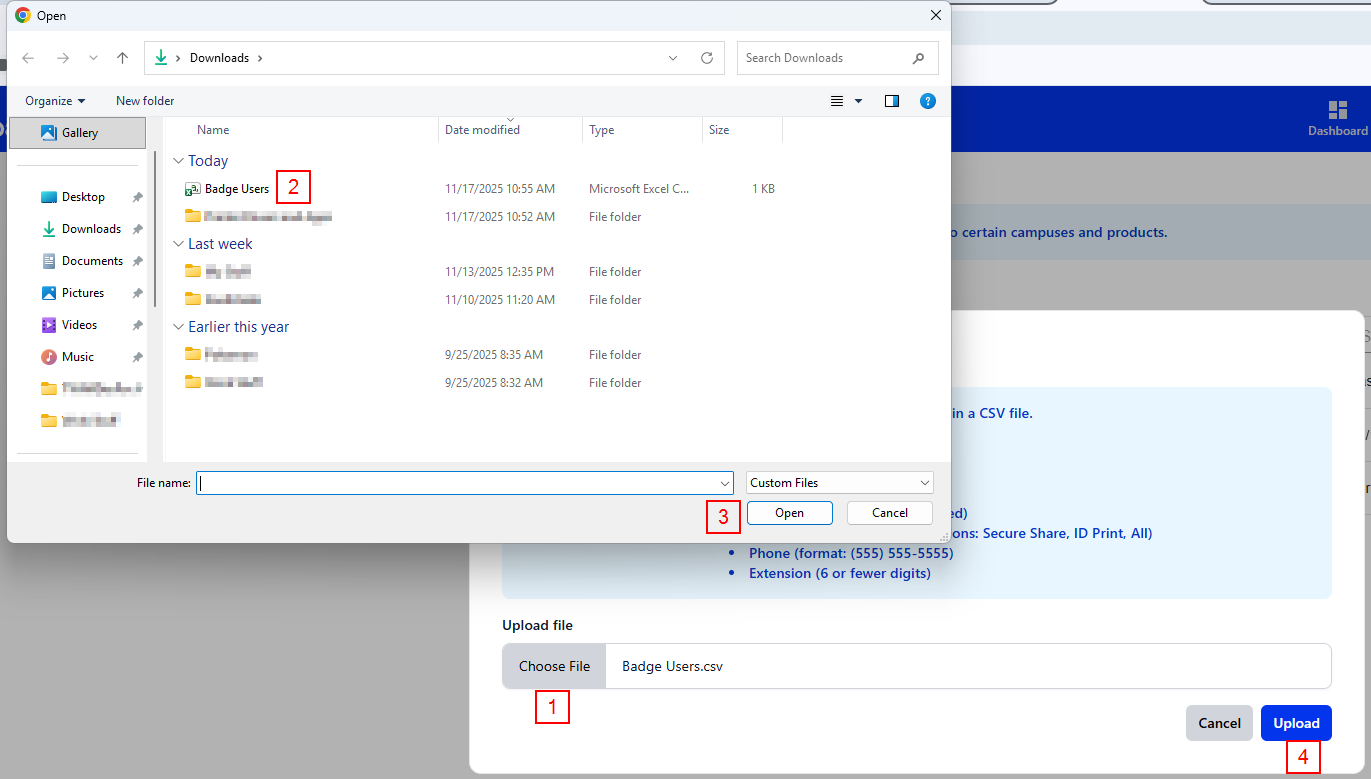
6. Click Upload
- You should receive a notification on the bottom left corner indicating a request has been made to the Users.

Was this article helpful?
That’s Great!
Thank you for your feedback
Sorry! We couldn't be helpful
Thank you for your feedback
Feedback sent
We appreciate your effort and will try to fix the article